Introduction
In the fast-paced and competitive world of soccer, physical fitness and technical skills are undoubtedly crucial. However, one element of performance that sets extraordinary players apart from the rest lies within their minds. Neuro skills, such as reaction time, eye-hand coordination, inhibition, mental flexibility, and anticipation, play a pivotal role in shaping a player’s success on the field. Soccer requires split-second decision-making, adaptability, and the ability to anticipate opponents’ moves to excel in various positions.
In this comprehensive blog post, we will delve deep into the realm of neuro skills in soccer and explore no-cost ways to train those skills that can elevate soccer players’ performance to new heights. As we journey through each cognition, we will discover their significance, examples of how they influence soccer performance, and how you can work to refine these essential skills to improve your own on field performance. Let’s uncover the untapped potential of neuro training in soccer and its impact on elevating player performance.
The Key Cognitions in Soccer
Reaction Time
In the fast-paced world of soccer, reaction time is a game-changer. It refers to how quickly a player can respond to external stimuli, such as oncoming passes, opponents’ movements, or sudden changes in the game. For positions like midfielders and strikers, where quick reflexes are essential, reaction time can be the difference between success and missed opportunities. Lightning-fast reaction time can help seize goal-scoring opportunities, catching defenders off-guard. Similarly, a midfielder who can quickly react to an opponent’s movements gains a competitive edge, intercepting passes and initiating counter-attacks.
Drill: Shadow Cones
- Set up cones: Find an open space and scatter cones or markers in a random arrangement. There is no specific pattern; the randomness is intentional to replicate the unpredictable nature of soccer.
- Partner up: Work with a teammate or training partner who will call out commands during the drill.
- Begin the drill: Stand facing the cones with your partner next to you. On your partner’s signal, move as quickly as possible to touch a designated cone. Your partner can call out different cone numbers or colors, requiring you to change direction and respond promptly.
- Add variations: As you become more comfortable with the drill, add variations to make it more challenging. For example, have your partner call out two or more cone numbers at once, requiring you to touch each one in rapid succession. You can also try the drill with backward movements or lateral shuffles.
- Stay focused and agile: Keep your eyes on your partner and the cones, staying alert for the next command. Focus on quick and precise movements to touch the designated cones efficiently.
Eye-Foot Coordination
Soccer players in all positions rely heavily on eye-foot coordination. This neuro skill allows players to control the ball with finesse, execute accurate passes, and deliver shots with pinpoint precision. Through focused and repetitive practice, players can elevate their ball control, passing accuracy, and overall performance on the field.
Mastering eye-foot coordination is particularly crucial for positions like midfielders, who are often at the center of ball distribution and playmaking. A midfielder with exceptional eye-foot coordination can effortlessly control the ball while scanning the field for passing opportunities. Likewise, a forward’s ability to receive and control the ball with precision can lead to more successful shots on goal.
Drill: Juggling
- Find an open space: Head to a park, backyard, or any area with enough room to juggle the ball freely without any obstacles.
- Start with your dominant foot: Begin by gently dropping the soccer ball from your dominant foot and try to kick it back up into the air with the same foot. Focus on maintaining a steady rhythm.
- Incorporate your non-dominant foot: Once you feel comfortable juggling with your dominant foot, challenge yourself to use your non-dominant foot as well. This will improve your coordination and balance on both sides.
- Keep your eyes on the ball: Maintaining constant eye contact with the ball is crucial for enhancing eye-foot coordination. This helps you anticipate the ball’s movement and make better contact with your feet.
- Increase the consecutive touches: Gradually work on increasing the number of consecutive touches you can make before the ball drops to the ground. Set achievable goals and challenge yourself to beat your personal best.
Inhibition
In high-pressure situations on the soccer field, staying focused and blocking out distractions is crucial. Inhibition, as a neuro skill, enables players to maintain their composure, make quick decisions, and filter out irrelevant information.
For defenders, maintaining strong inhibition skills is essential, especially during critical moments when they need to mark opponents tightly and avoid getting drawn out of position. Similarly, goalkeepers with heightened inhibition can remain calm during penalty kicks, enabling them to anticipate the direction of shots and make crucial saves.
Drill: Noise and Distraction Drill
- Find a quiet space: Begin by choosing a quiet area to practice, such as an open field or a room without any background noise.
- Introduce distractions: To simulate external distractions, players can use various noise sources, such as playing music or having a teammate or friend create random sounds.
- Stay focused on the task: While the distractions are ongoing, challenge yourself to maintain your focus on the ball or a specific target. Block out the noise and concentrate solely on the task at hand.
- Engage in ball control exercises: Perform various ball control exercises, such as dribbling through cones, juggling the ball, or passing against a wall. The key is to execute these drills with precision and accuracy despite the distractions.
- Gradually increase the difficulty: As you become more adept at blocking out the distractions, progressively increase the intensity of the noise sources. This will test your ability to maintain composure and focus under mounting pressure.
- Reflect and adjust: After completing the Noise and Distraction Challenge, take a moment to reflect on your performance. Assess how well you managed to stay focused and composed amid the distractions. Identify areas for improvement and make adjustments accordingly.
Mental Flexibility
For versatile soccer players, like midfielders and defenders, mental flexibility is paramount. This neuro skill empowers players to adjust their strategies on the fly, read the game effectively, and seamlessly transition between offensive and defensive roles.
Midfielders, often tasked with dictating the game’s tempo, need exceptional mental flexibility to switch from defensive cover to orchestrating attacking moves seamlessly. Defenders must anticipate their opponents’ next moves and swiftly adapt their positioning to neutralize threats effectively.
Drill: Position Switch Challenge
- Set up a practice area: Find a suitable area on the field or create a designated space with markers to serve as the training ground.
- Assign offensive and defensive roles: Divide players into two groups – one group will take on offensive roles (e.g., forwards or attacking midfielders), and the other will assume defensive roles (e.g., defenders or defensive midfielders).
- Rapidly switch positions: Start the drill with players in their designated positions. At the coach’s or a teammate’s signal, players must quickly switch roles. For example, offensive players will become defenders, and vice versa.
- Stay alert and adapt: As the drill progresses, the coach or a teammate can call out scenarios or movements that require players to adjust their positions. For instance, players may need to transition from attacking to defending in response to a counterattack or vice versa.
- Execute game scenarios: Incorporate game-like situations, such as passing sequences or one-on-one challenges, that prompt players to rapidly switch between offensive and defensive roles based on the ball’s location and game dynamics.
- Reflect and learn: After the drill, gather feedback from players about their experience. Discuss the challenges they faced in transitioning between roles and identify areas for improvement.
Anticipation
Anticipation is the sixth sense of elite soccer players. It allows them to predict their opponents’ moves, anticipate the trajectory of passes, and position themselves optimally on the field. Enhanced anticipation leads to quicker reactions, improved positioning, and the ability to capitalize on scoring opportunities.
A goalkeeper with exceptional anticipation can anticipate the direction of a penalty kick, giving them a greater chance of making a crucial save. Forwards with heightened anticipation can exploit defensive vulnerabilities and create goal-scoring opportunities for themselves and their teammates.
Drill: Passing Lane Intercept
- Set up a grid: Create a rectangular playing area with cones to serve as the practice grid. The size can vary based on the number of players participating.
- Divide into teams: Split players into two teams, with one team acting as the offensive team and the other as the defensive team.
- Form passing lanes: The offensive team stands in a line, spaced evenly along one side of the grid. The defensive team forms a line on the opposite side, facing their offensive counterparts.
- Anticipate and intercept: The objective of the drill is for defensive players to anticipate passes from the offensive players and intercept the ball. The offensive team attempts to pass the ball across the grid to their teammates, while the defensive team focuses on reading the passes and moving to cut off the passing lanes.
- Intercept and switch roles: Defensive players aim to intercept as many passes as possible. Whenever a defensive player successfully intercepts a pass, they switch roles with the offensive player who attempted the pass.
- Vary the intensity: The drill can be performed at different speeds, with both offensive and defensive teams encouraged to challenge each other. Increase the pace of passes to challenge defenders’ anticipation skills further.
- Encourage communication: Communication among defensive players is essential to ensure they coordinate their movements and cover passing lanes effectively.
- Rotate positions: After a set period, rotate the teams so that players have the opportunity to practice both offensive passing and defensive anticipation.
Conclusion
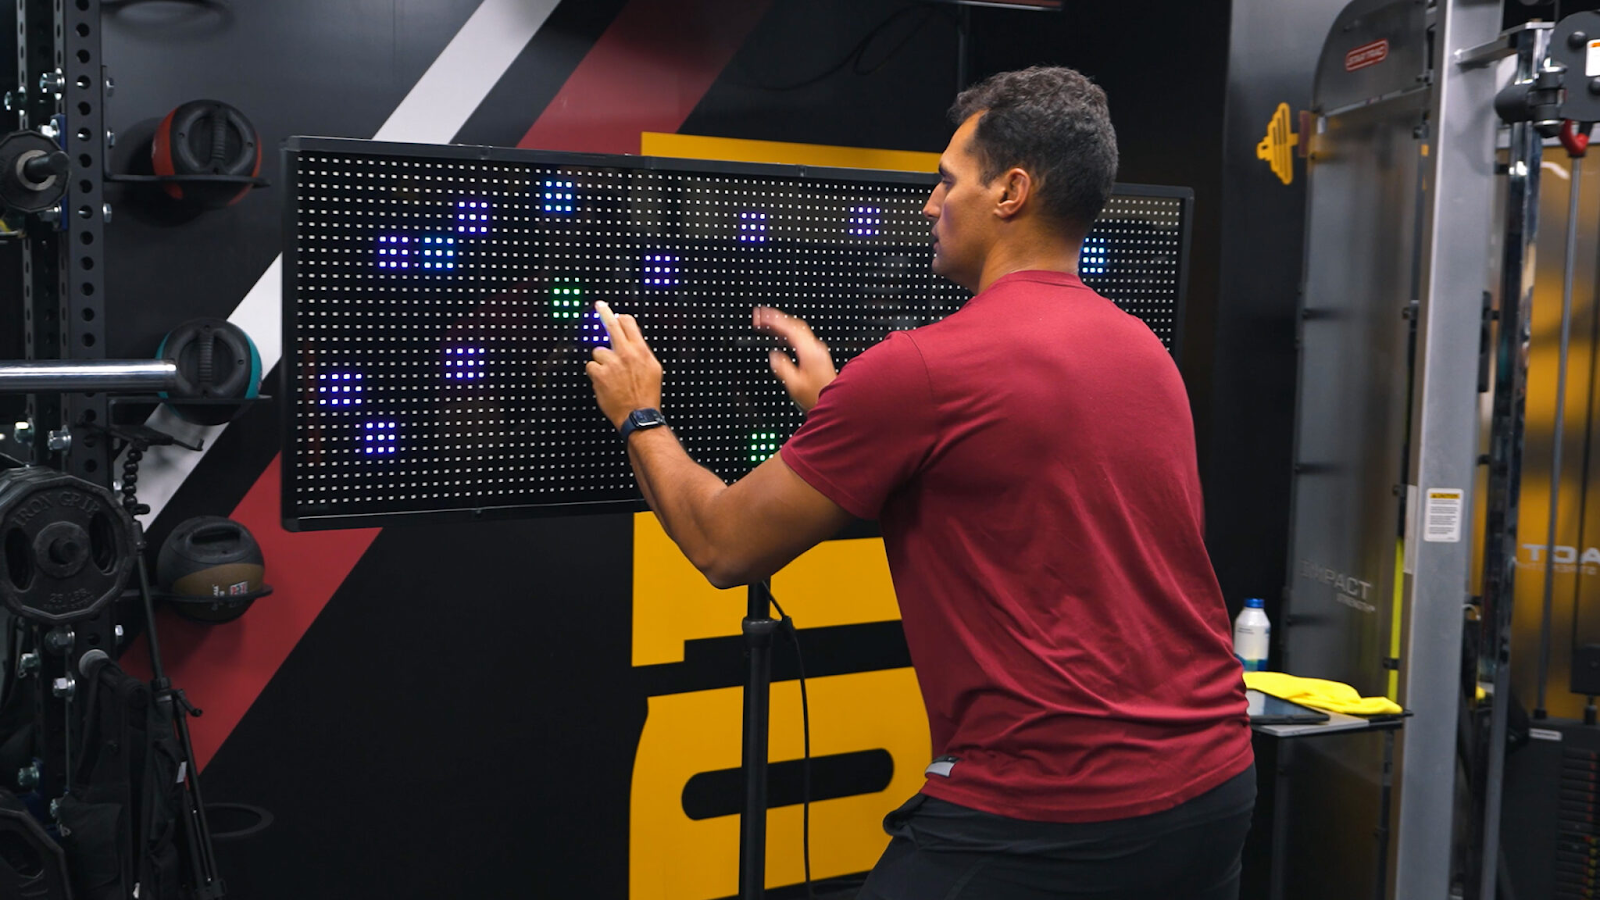
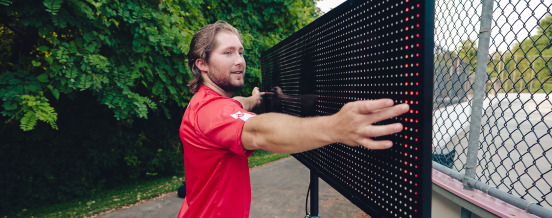
As soccer continues to evolve, the value of neuro training in player development becomes increasingly evident. Reflexion’s personalized neuro training technology offers a groundbreaking approach to hone the key cognitions that matter in soccer. From reaction time to anticipation, every facet of a player’s neuro skills can be improved with Reflexion’s personalized training programs. To learn more about exactly which neuro skills matter most for you, head over to our free training personalizer.
For more free training resources, check our our Free Training Resources Youtube Playlist.